Baldur’s Gate 3 Photo Mode is such a huge hit with players that in Patch 8, Larian Studios has decided to enhance the tool.

With Patch 8, Baldur’s Gate 3 finally got Photo Mode, among the most awaited features since the game’s official release. This feature gives players a lot more options when it comes to snapping screenshots. The new tool gives you complete control over character positioning and post-processing, as well as the ability to tilt and pan the in-game camera whilst exploring the map.
With that flexibility, gamers can create original scenarios that capture special events in each of the game’s three acts. The mode’s built-in UI makes it easy for both novices and pros to navigate, and it enables everything from intense, dramatic compositions to playful images that embrace the Dungeons & Dragons fun.
Here’s how to operate the newly introduced Photo Mode in Baldur’s Gate 3 for those who want to practice their photography with Patch 8.
Baldur's Gate 3 Photo Mode 101: Learning How to Use the New Tool
The good news is that it’s not complex or difficult to enter the Photo Mode option in Baldur’s Gate 3. PC players can access the interface and explore all of the customization choices at any time while exploring or fighting by using the F9 key or choosing the camera icon that has been added beneath the mini-map.
The procedure is as straightforward for players using a controller. To access the Photo Mode features of Baldur’s Gate 3, press both analog sticks at the same time (R3+L3). In order to record memorable, poignant, or even humorous moments from their voyage, players can then freely alter the camera position, add visual filters, alter the depth of field, and experiment with lighting.

Familiarize Yourself With the Controls in BG3 Photo Mode
You can frame shots in Baldur’s Gate 3 Photo Mode without having to interact with the side panels by using the direct commands listed below:
- W A S D– Move the camera
- Q E – Rotate the camera
- Z X– Raise or lower the camera without tilting it
- P– Show or hide the Photo Mode HUD
- Space – Capture the image
To operate the camera if you’re using a controller, you must hit Y/Triangle. For access to the HUD and control the remaining customization options, just press the exact same button once again.
- Left Stick – Move the camera
- Right Stick – Rotate the camera
- R1 L1 / RB LB– Tilt the camera
- L2 / LT / R2 / RT(When controlling camera) – Raise or lower the camera without tilting it
- L2 / LT – Show or hide the Photo Mode HUD
- R2 / RT– Capture the image
The true flexibility of Baldur’s Gate 3‘s Photo Mode, however, is found in the additional customization choices the game offers, which let players alter not just the camera’s motions but also the characters’ positions and facial expressions. For instance, the player can better adjust the camera’s position and focus with the first two HUD choices, while the remaining options go a little farther.
Character Customization With Baldur's Gate 3 Photo Mode: Teaching You the Fundamentals
The great thing about Baldur’s Gate 3‘s Photo Mode is the amount of creative freedom players have while creating an image. The ability to change a character’s position and present actions is one of its primary features. By selecting the Character Settings tab (the third tab on the HUD), gamers can freely alter these preferences.
Players can only alter party members—not adversaries or non-player characters—and only one character at a time. However, users may also choose who shows in the screenshot using this option if they want a cleaner image. Baldur’s Gate 3 NPCs, adversaries, and even allies can be eliminated from the mix.
- Expression:Players can alter each character’s facial expression in the picture with this setting. Numerous emotions are available, and several of them have minor variants, so each picture has a lot of variance.
- Pose:The amazing team at Larian Studios has made over 40 base poses, most with variations, for the various in-game characters that use Photo Mode. This gives gamers even more creative options for scene composition, allowing them to create original settings by arranging the characters in different ways.
Players may precisely position each party member by modifying the X, Y, Z coordinates and Rotation in addition to establishing expressions and poses. Players can apply finishing touches, like altering a character’s attire to camp attire or taking off their helmet, using the remaining choices under Character Settings.

Explore the New Post-Processing Features in Baldur's Gate 3 Photo Mode
Baldur’s Gate 3 now offers in-game tools to enhance screenshots, eliminating the need for third-party software. With the addition of post-processing options in Patch 8, players can adjust settings like contrast, saturation, and other effects to improve their photos directly within the game.
Below are the key post-processing options and their functions:
- Color Grading: Utilizes preset filters to modify the color tone of the photo.
- Contrast: Gives users the ability to adjust the contrast between dark and light areas.
- Saturation: Adjusts the intensity of the colors.
- Highlights: Modifies the contrast in the lightest areas of the image.
- Brightness: This lets players manage the image’s overall brightness.
- Vignette: Puts a “fading effect” to the margins of the game’s frame, either light or dark.
- Vignette Opacity: Controls the visibility of the vignette effect.
- Vignette Thickness: Sets the width of the vignette’s fading effect.
There is a bit of a downside here because sadly, dialogues and cutscenes in Baldur’s Gate 3 don’t blend well with Photo Mode. While there are some limitations, players can still adjust post-processing effects, apply stickers, and add frames. Other options, however, may not be accessible at all times.
Using Frames and Stickers in Baldur's Gate 3 Photo Mode
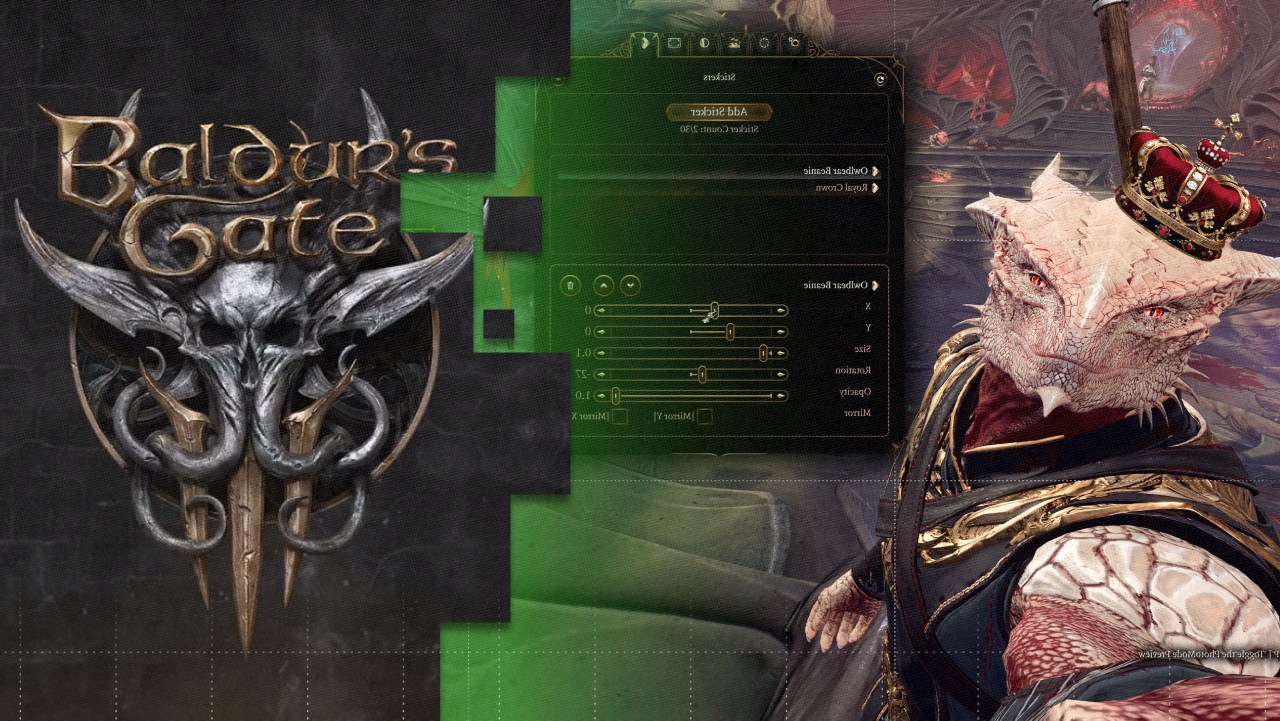
To add more flair to your screenshots, Baldur’s Gate 3 Photo Mode includes options for Frames and Stickers, located in the fifth and sixth tabs. The Frames section offers various creative styles, including cinematic bars, and allows players to adjust the opacity and size of the black bars for a more dramatic or minimalist effect.
Stickers give players the ability to add up to 30 different graphic elements to their images. Each sticker can be resized, repositioned, and its opacity can be adjusted. From humorous icons to dramatic effects, these tools allow for more creative expression, making it easier to capture memorable moments, whether you’re making a meme or preserving a romantic scene.
Where Are Baldur's Gate 3 Screenshots Saved?
Screenshots taken in Baldur’s Gate 3 Photo Mode are stored in a dedicated folder created by Larian Studios for Steam users. To find your screenshots, navigate to:
C:(Username)\Documents\Larian Studios\Baldur’s Gate 3\Screenshots
For players using external capture tools or Steam’s built-in screenshot feature, the images will be saved in the folder linked to that tool. Console players can also access their saved screenshots through specific apps. On Xbox Series X|S, users can view their screenshots via the Capture & Share menu, while on PlayStation 5, screenshots are stored in the Media Gallery.

Enjoy Capturing Moments in Baldur's Gate 3 Photo Mode!
Now that you’re familiar with the features of Baldur’s Gate 3 photo mode, you can start capturing your favorite in-game moments and preserving them for the future.
Be sure to share your best shots with the community—especially with us here at GameEels! We’d love to see your favorite moments from the game.
Be sure to read our other guide articles to keep up with what’s hot and what’s not in the gaming world, and you might want to check out the best mobile game controllers we suggest that you get. Stay tuned and catch the gaming current with GameEels!